How to Wire a Light Switch
A guide on how to connect different types of light switches, including, one way light switches, two way light switches and intermediate light switches.
Note: Connecting and disconnecting of light switches should only be carried out by a competent person.
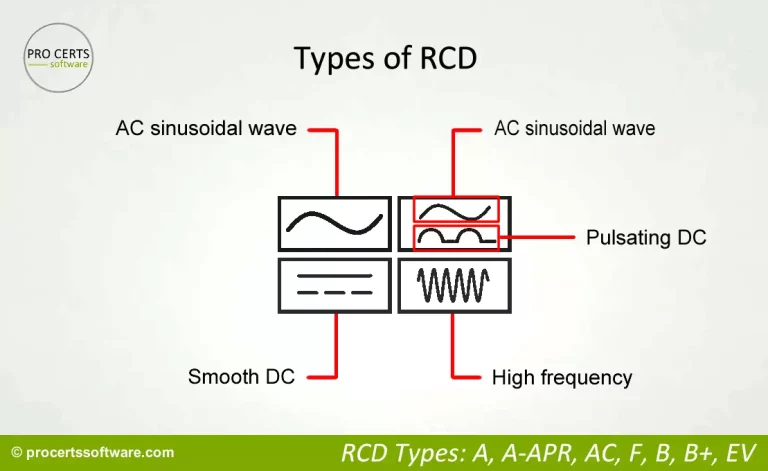
Types of Light Switches
There are many types of light switches, 1 way, 2 way and intermediate, then is the number of switches on a switch plate, 1 gang, 2 gang, 3 gang and so on, then there are many types of dimmer switches, leading edge, trailing edge, LED etc. There is also varying IP rated light switches.
Each type of light switch connection is different, the wiring diagram for a 1 way light switch is different to the wiring diagram for a 2 way light switch. It is important to ensure the correct light switch is selected for its intended use.
1 Way Light Switch

A “1 way” light switch can be used to switch on and off a light fitting, if the same light fitting needs to be switched from two different positions i.e. top of stairs and bottom of stairs then a 1 gang 2 way light switch is required, one at the bottom of the stairs and another at the top of the stairs.
2 Way Light Switch

A “2 way” light switch is used to switch on and off a light fitting from two different switches, for example a large room may have two entrances where you want to be able to switch the lights on and off from.
Intermediate Light Switch

An “intermediate” light switch is required when you wish to turn on and off a light fitting from more than two different switches, for example a large room may have three entrances where you want to be able to switch the lights on and off from each entrance.
Light Switch Wiring Diagrams
Light switch wiring diagrams for UK wiring colours, note the earths have been omitted for clarity.
The earth core of a cable should NEVER be cut-off. If the backbox is metal and the light switch is plastic then connect the circuit protective conductor (earth) to the metal backbox earth terminal, if the light switch is also metal then connect an additional earth link from the metal back box earth terminal to the metal light switch earth terminal.
If the backbox (or pattress) and the light switch are both plastic then terminate the earth cables into a suitable electrical connector, if there is more than 1 earth cable then connect all the earth cores together using a suitable insulated connector.
Light switch wiring colours, the wiring colours in the UK changed in 2006, therefore below we have set out both the old UK wiring colours (Red, Black, Yellow, Blue) and the new UK wiring colours (Brown, Blue, Black, Grey) light switch wiring diagrams.
Pre 2006 UK wiring colours were, Red = Live, Black = Neutral, earth = Green and Yellow, after 2006 (to date) the UK wiring colours are, Brown = Live, Blue = Neutral, Earth = Green and Yellow.
1 Way Light Switch Wiring Diagrams
C = Common, L1 = Switched Live 1 Way, L2 = Switched Live 2 Way. For two way switching, the wires for L1 and L2 are referred to as the “strappers”.
1 way light switch connections (old colours)
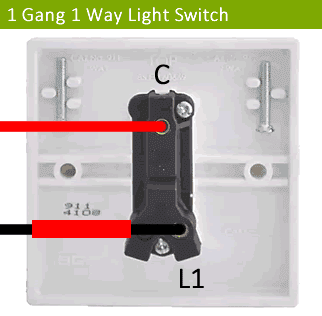
- C = Red
- L1 = Black (with red sleaving)
1 way light switch connections (new colours)

- C = Brown
- L1 = Blue (with brown sleaving)
2 Way Light Switch Wiring Diagrams
2 way light switch connections (old colours).

- C = Yellow (with red sleaving)
- L1 = Red
- L2 = Blue (with red sleaving)
2 way light switch connections (new colours)

- C = Grey (with brown sleaving)
- L1 = Brown
- L2 = Black (with brown sleaving)
2, 2 way light switches connections (old colours)

- C = Yellow (with red sleaving)
- L1 = Red
- L2 = Black and blue (with red sleaving)
2, 2 way light switches connections (new colours)

- C = Grey (with brown sleaving)
- L1 = Brown
- L2 = Blue and black (with brown sleaving)
A side note on two way light switch electrical connections,

For two way switching, it doesn’t really matter what order the connections are in at switch No.2, as long as the 3 core cable between the switches matches the connections at switch No.1.
A two way light switch can also be used as a one way light switch buy only using terminals C and L1 of the two way switch.
Shown above are the wiring colours and order of connections (terminations) commonly used.
Light Switch Terminology:
The number of actual switches contained or mounted on a single plate is denoted by the number of “gangs”, for example,
- A 1 gang light switch is a switch plate with only 1 switch.
- A 2 gang light switch is a switch plate with 2 switches.
- A 3 gang light switch is a switch plate with 3 switches.
- A 4 gang light switch is a switch plate with 4 switches.
There are 3 main types of light switches in terms of switching capabilities which are 1 way, 2 way or intermediate.
- A 1 way light switch is where a light only needs to be switched from 1 light switch.
- A 2 way light switch is where a light is to be switched from more than 1 light switch (i.e. A landing light switched at the top of the stairs and another switch at the bottom of the stairs).
- An Intermediate light switch is required where a light needs to be switched from more than 2 light switches.
How to Wire a Dimmer Switch
The wiring connections for dimmer switches are the same as shown in the how to wire a light switch diagrams above.
When selecting a dimmer switch it is important to ensure the correct dimmer switch is selected matching the rating and type of lamps it is to dim. Dimmer switches have a maximum load they can dim, for example a standard incandescent 100 watt dimmer switch can only dim up to a maximum of a 100 watt incandescent load.
If you exceed this maximum load it can cause the dimmer switch module to overheat and melt due to it being overloaded.
LED dimmer switches are available in many types and ratings, for an LED dimmer switch it is best to contact the manufacture of the LED lamps who can advise on the best suited LED dimmer switch.
Common Errors
A common issue is with metal light switches where the yellow core of a 3 core cable at a 2 way light switch has been connected to the earth terminal of the light switch. When the two way switches are in a certain position the yellow core of the cable will become live. thus making the metal light switch live resulting in a risk of electric shock.
As many electricians discover on a daily basis that DIY electrical works are generally dangerous, non-compliant and normally ends up costing a lot more in the long run due to the costs involved to correct and make safe the DIY works.
Another common issue electricians are finding with DIY fitted light switches is where the earth core of the cable is being used as a live conductor, which of course is non-compliant and dangerous.
A light switch which has been connected incorrectly can cause a number of issues such as,
- Light wont switch off.
- Light wont switch on.
- Light flickers when connected to two 2 way light switches.
- Metal light switch becomes live / trips when the yellow strapper core has been connected to the earth terminal.
Never ever cut-off the earth core (cpc).